Monday, June 30, 2014

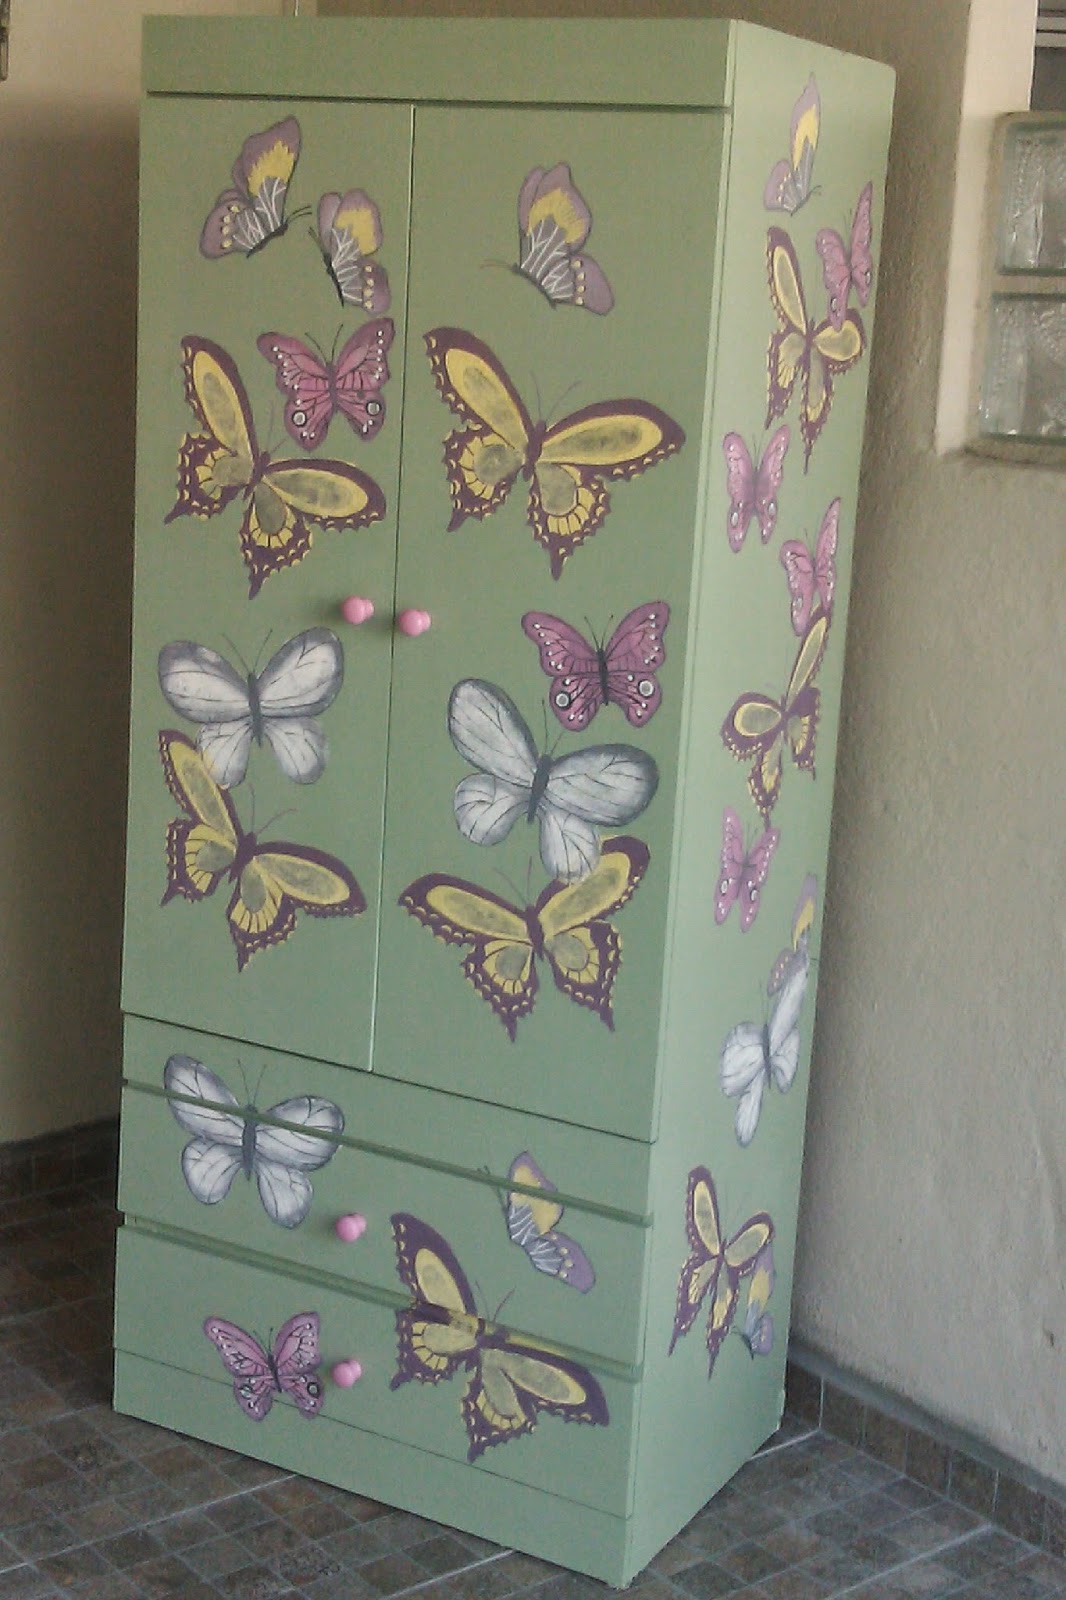
Butterfly Cupboard


Remember this minty-coloured dresser I painted some time back?  It started out as the very ordinary one you buy straight off the store.  This is the Before.


And I painted it, changed the handles to this After:


Well, someone bought it from me and later ordered a cupboard, painted specially for her young daughter. Here's how it was done, in pictures.  (I forgot to take a picture of the green painted after the primer, though. However, you will see a trusty carrot come to the fore again!)


Here's the little Princess in her room!


Before:


 And, After:


Tuesday, June 17, 2014

A Little DIY Fun (but aren't they all?)

Remember this trolley I made quite a while ago?  It was made completely with recycled wood. You can read about that here


Someone recently ordered one exactly like it, except she wanted it taller, and with three tiers.  Here is the new one in the making.  It is 40 inches tall!  (As I am running out of scrap wood, I had to buy some wood to complete this project.)


The kitchen it is going to is mostly a combination of cream/beige/light brown.  So we decided it needed a pop of colour.  A facebook chat we had went something like this...


Me:  ummm....I've done one coat of paint but I think maybe you'd better come take a look at the orange.  It not only pops, but it.. ummm...kinda... explodes.

Client:  That's cos you're the bomb!

Hahahaha!  Ya, right.

Here's an idea of the size next to the old one (the wheels had not yet been fixed).


When it was done, I had some fun with it...first, imagining it in a kitchen. These two fellas came to play...


Then I imagined it in a garden...


The best thing about it is, it can be used in the kitchen, in a garden, as a bookshelf, as a bar cart...I love that it's so versatile!                                                                                                                                          


Wednesday, May 14, 2014

For Want of a Garden

Hello! I'm baaaack!

By way of explanation, I'd been working in an office for about 6 months and could not at all keep up with blogging.  Now we shall resume like old friends who meet up after many years and continue a conversation like it never ended.  Okay?

Okay.

Thank you for that resounding response.

I was looking through photos and did not even know I had these.  We don't have a garden so I have to devise ways to make my porch pretty.  (My porch does not look like this now as we've had it tiled since, so this is like a Throwback Porch?)

1.  Take one ugly corner of your porch...


2.  Find some tree stumps (yes, hubby and I screech car brakes whenever I see things like these by the wayside).

3.  Drive some nails on the top of the stumps so you can position the pots (through the holes at the bottom of the pots) and they won't topple over easily.

4.  Choose pretty plants.


Love this one but it has since died. RIP.  See, the thing about rearing plants and rearing pets is you are less likely to get emotional when a plant dies.  I can't handle pets dying on me.


4.  Choose SPTs around the house.


The windows on this wooden plaque can actually open...


*SPTs - Sweet, pretty things - I knew you'd ask :)


5.  Buy pebbles, black or white. Or green or amber or fuschia or mauve or luminous.  It's your porch. (luminous....heyyyyyy....are you thinking what I'm thinking?)


6.  Put them all together.  And....

7.  Now sing that Happy song..."clap along if you know what happiness is to you.."


Oh, you know that wooden window plaque thing?  Visitors to our home actually open those windows out of curiosity, so we let them....


Tuesday, December 24, 2013

Christmas Tree DIY the Second


You will recall last year I made a ceiling-high DIY Christmas tree, using patches of denim cloth.  Here is the post, if you're interested:
 http://tree-shades.blogspot.com/2012/12/christmas-tree-diy-us3000.html

Here's a quick peek at last year's tree...


It was skinny, as my living room space is rather small so the ladder under it was not spread out the full width.

This year, I decided it'll just have to go outside, so it won't be in the way.

As I was seriously lacking in time, I posted on facebook if there were any elves who could come help me. (I'd pay in pizza!)  And immediately this bunch volunteered!


How awesome are my friends, big and little.  Gelyn is Papua New Guinean, married to a Malaysian.

I'll let the pictures do the talking.


Plain ol' newspaper.  Lots of it!  And staples - 1,509,267 of 'em.


Layer by layer.....


The top!


The baubles had to be toned down (less is more) so the newspaper could stand out.


So here's last year's... 


And here's this year's (I can't seem to put them side by side)...


What was my inspiration?  I remember seeing a fashion show on TV a long time back and this gorgeous gown stuck in my head!  I couldn't find the actual one but this Christian Dior dress with ruffles is something like what I saw. 


So yah, let's see......


I'm getting there, I'm getting there..... :)